I recently got into designing very small games using Javascript. Working with canvas in the browser helped me appreciate how vast and complex games can be. I truly am a beginner at this point but there are few things that helped me get started. Spagetti code can only get you so far, but with a structured StateStack Engine, development is much more fun and easier.
I first read about it right here and decided to implement it using the same concept. But before we get started let me introduce a few concepts.
The Game Loop
The game loop is the engine drives the whole game. Be it updating scores, making the main character jump or animating an explosion, it is all controlled from the game loop. In reality the game loop is just a controlled infinite loop. It constantly checks for values to update and then redraws the the elements in the output screen (the canvas in our case).
That's all there is to it really. The challenge is in the "controlled" part of the loop, so let's get to it.
The Game State
You can easily write the whole game inside a function and insert it in an infinite loop and let it run continuously. As the game grows it might start to become more and more challenging to add new features.
var main_loop = function () {

    // update all values
    ...

    // draw on the canvas.
    ...
};

var timer = setInterval(function (){
        main_loop();
},1000/30);
This function will now run at around 30 frames per second if the browser allows it. As the game grows it will be hard to track what is happening. A state can be treated like a level in the game for example. When you start the game, you have the main menu. This can be the first state. Then you hit start game and you get an intro. This will be your second state. Then level1 will be your third state and so on. The idea is to separate your game into different entities that can be accessed at any time.
For example, right in the middle of a battle scene, you can press the menu button and the inventory window appears. You are switching from the battle state to the inventory state. Now the inventory state gets all the attention.
Most likely you will be reading this at work. I got you covered.
A State Object
The State Object will require 4 methods in order to run correctly:
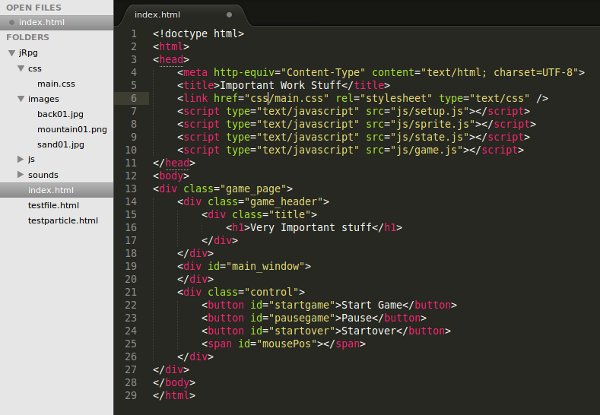
// file: setup.js
var State = function() {
    this.name ; // Just to identify the State
    this.update  = function (){};
    this.render  = function (){};
    this.onEnter = function (){};
    this.onExit  = function (){};

    // Optional but useful
    this.onPause = function (){};
    this.onResume= function (){};
};
The methods name are self explanatory. When you enter a new state, the onEnter method is first called: You can setup any environment in here such as click events, triggers or any thing that needs to be initialized. The the update and render method are called in that order. They are continuously called as long as the state is active. The onExit method is called right before the state shuts down, you can use it to clean up or save the state at that point.
Note: The onPause is called when the game/state is paused and the onResume is called before the game is reinstated.
A State List
A state list can simply be an array but I used the following structure just to make it a little easier:
// file: setup.js
var StateList = function (){
        var states = [];
        this.pop = function () {
                return states.pop();
        };
        this.push = function (state) {
                states.push(state);
        };
        this.top = function (){
                return states[states.length-1];
        }
};
- The push() function adds a new State in the list
- The pop() function removes the latest state from the list.
- The top() function returns the current state which is the latest.
The StateStack.
The StateStack controls the current state. Let's start with the code and I will explain:
// file: setup.js
var StateStack = function () {
    var states = new StateList();
    states.push(new EmptyState());
    this.update = function (){
            var state = states.top();
            if (state){
                    state.update();
            }
    };
    this.render = function (){
            var state = states.top();
            if (state){
                    state.render();
            }
    };
    this.push = function (state) {
            states.push(state);
            state.onEnter();
    };
    this.pop = function () {
            var state = states.top();
            state.onExit();
            return states.pop();
    };

    this.pause = function (){
            var state = states.top();
            if (state.onPause){
                    state.onPause();
            }
    };

    this.resume = function (){
            var state = states.top();
            if (state.onResume){
                    state.onResume();
            }
    };
};
A StateList object is created to keep a record of all the states. A generic EmptyState, that does nothing really is added to the queue just to prevent errors. You can also use this state to check if there is nothing running.
- The push() method adds a new State to the list and triggers onEnter(). This is why we added onEnter to the State Object earlier. Right when your state is loaded the onEnter method is triggered and your values are initialized.
- The update() method calls the update method from the current state
- The render() method is immediately called after update to render the values that have been updated in your state.
- The pause() and resume() methods call their optional counterpart inside your state. if you want something to happen right before you switch to another state and right when you come back, these are the places to put it in.
We now have our StateStack stack ready. Let's create the rules to load it.
Game.js
The Game object will setup a few things for us and start the game loop
// file: game.js
var Game = {
    // Canvas to draw on
    canvas_width:   640,
    canvas_height:  480,
    canvasElement:  null,
    canvas :        null,


    // The game loop
    FPS: 30,
    timer:null,
    timerID: null, // interval


    gameMode: new StateStack(),

    update: function () {
        this.gameMode.update();
        this.gameMode.render();
    },


    startGame: function() {
        this.gameMode.push(new MainMenuState());
        this.timerID = setInterval(this.update.bind(this),this.timer);

    },

    pauseGame:function (){
        clearInterval(this.timerID);
    },

    resumeGame: function (){
        this.timerID = setInterval(this.update.bind(this),this.timer);
    },

    /**
     * Initialize the canvas to the page
     */
    setupCanvas: function (wrapper) {
        this.canvasElement = document.createElement("canvas");
        this.canvasElement.width = this.canvas_width;
        this.canvasElement.height = this.canvas_height;
        this.canvas = this.canvasElement.getContext("2d");

        wrapper.appendChild(this.canvasElement);
    },

    init: function () {
        this.setupCanvas(document.getElementById("main_window"));
        this.timer = 1000/this.FPS;
        this.startGame();
    },
}
This is pretty straightforward, let's pay attention to the init() function.
- The canvas is selected and initialized,
- the frame rate is set.
- and the main loop is started.
For this particular case I decided to run everything on the onload event and setup a few other globals that can be handy:
window.onload = function () {
    window.getGameInstance = function () {
        return Game.gameMode;
    };

    window.getCanvas = function (){
        return Game.canvas;
    };

    window.getGameDimensions = function() {
        return {
            width: Game.canvas_width,
            height: Game.canvas_height
        };
    };

    window.pauseGame = function (){
        Game.gameMode.pause();
        Game.pauseGame();
    };

    window.resumeGame = function () {
        Game.resumeGame();
        Game.gameMode.resume();
    };

    window.getCanvasElement = function (){
        return Game.canvasElement;
    };

    Game.init();
};
| Method | Description |
|---|---|
| getGameInstance | This returns the StateStack Object |
| getCanvas | This returns the canvas context object. It may be a little confusing but it works for me. Feel free to chage it to getContext |
| getGameDimensions | This returns the dimensions of the canvas |
| pauseGame | This pauses the game loop and trigger the on pause method on the current state |
| resumeGame | This triggers onResume event on the current state and resumes game loop |
| getCanvasElement | This returns the actual canvas from the DOM |
We now have a fully functioning StateStack engine that can help you get started with your game.
Take a break. Sometimes you just have to take it easy.
OK we are back. We now have an engine (see above), a car (the browser), all we need is a destination (the game).
Game Main Menu
Every game start with some sort of main menu, so let's start with creating that.
// MainMenuState.js
var MainMenuState = function () {
    this.name = "MainMenuState";

    var canvas = getCanvas(),
        dimensions = getGameDimensions();

    this.onEnter = function(){};
    this.onExit  = function(){};

    this.update = function (){
            // update values
    };

    this.render = function (){
            // redraw
    };
};
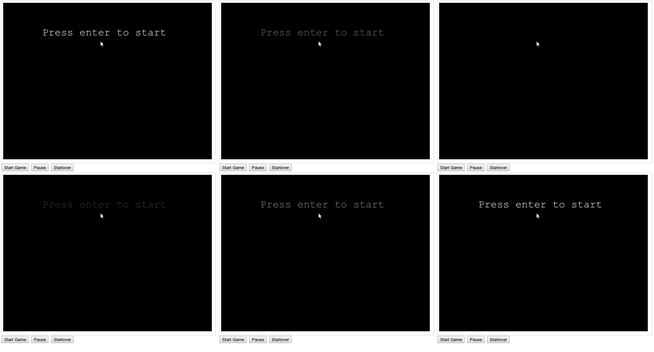
We now have a structure but it doesn't do anything. Let's create a text in the center that fades in and out with the text, "Press enter to start".
// MainMenuState.js
var MainMenuState = function () {
    this.name = "MainMenuState";

    var canvas = getCanvas(),
        dimensions = getGameDimensions(),
        backgroundColor = "#000",
        textColor = "rgb(0,0,0)", // Starts with black
        colorsArray = [], // our fade values
        colorIndex = 0;

    this.onEnter = function(){
        var i = 1,l=100,values = [];
        for(;i<=l;i++){
            values.push(Math.round(Math.sin(Math.PI*i/100)*255));
        }
        colorsArray = values;

        // When the Enter key is pressed go to the next state
        window.onkeydown = function (e) {
            var keyCode = e.keyCode;
            if (keyCode === 13){
                // Go to next State
                var gameMode = getGameInstance();
                gameMode.push(new Level1State());
                /** Note that this does not remove the current state
                 *  from the list. it just adds Level1State on top of it.
                 */
            }
        };
    };

    this.onExit  = function(){
        // clear the keydown event
        window.onkeydown = null;
    };

    this.update = function (){
        // update values
        if (colorIndex == colorsArray.length){
            colorIndex = 0;
        }
        textColor = "rgb("+colorsArray[colorIndex]+","+colorsArray[colorIndex]+","+colorsArray[colorIndex]+")";
        colorIndex++;
    };

    this.render = function (){
        // redraw
        canvas.clearRect(0,0,dimensions.width,dimensions.height)
        canvas.beginPath();
        canvas.fillStyle = backgroundColor;
        canvas.fillColor = backgroundColor;
        canvas.fillRect(0,0,dimensions.width,dimensions.height);
        canvas.fillStyle = textColor;
        canvas.font = "24pt Courier";
        canvas.fillText(mainText, 120, 100);
    };
};
When your game is loaded, the canvas is initialized and the animation starts. When the enter key is pressed, the next state is loaded.
Here is a little video to demonstrate what you can do when you put it all together.
Making a game with a StateStack Engine
This is by no mean the best engine to make a game. It is just a place to start. Maybe you can improve this code and share it back right here with me. I have always been interested in games but I had a very hard time trying to get started, I hope this little tutorial can at least help you break the barrier put you in a path to create awesome games. Happy coding!



Comments(4)
David :
I found your post very very very useful!.
I'm doing a 2D puzzle game prototype with HTML5 canvas and Javascript and I was a bit lost because I've never done a game before, but this helped me a lot to figure out a way of starting it and learn things that I didn't know.
Thanks you very much!
Ibrahim Diallo author :
Thanks David. I am glad you found it useful.
Don't forget to share a link to your game when it is ready :)
Markus :
StateList and EmptyState are never defined. How did your code work for you?
Ibrahim author :
Hi Markus.
StateList is defined in the file called setup.js
And EmptyState is a generic object that only has empty functions:
This can be define on top since the other parts of the code depends on it.
I hope it helps you.
Let's hear your thoughts