
I previously wrote about how files are represented in your computer and what happened when you delete them. Files are the basis of everything we do on a computer. This article is saved as a 2015.07.14.files.txt file on my computer. The .txt extension lets my computer know that this file is to be read by a text editor. If I wrote this on Microsoft Word the extension would be .docx letting the computer know the right program to read it.
What happens if I take my .txt file and try to open it on Microsoft Word? Or if I use my plain text editor to open a word document, what will happen?
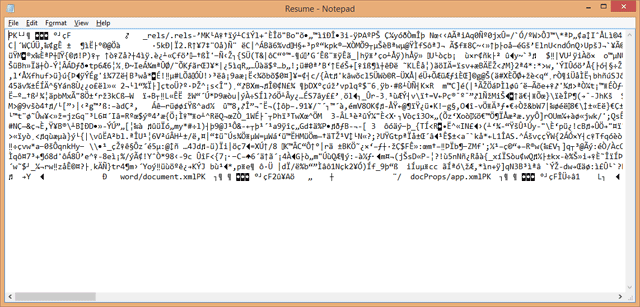
A word document opened in a plain text editor.
It's all gibberish. Well binary to be exact. Files are saved as zeroes and ones and sometimes they don't make much sense by themselves. Microsoft Word doesn't just look at the file extension to load a document, it checks for some values in the binary file to make sense of 0s and 1s. What you see in the image above is the editor's attempt to make sense of the binary data.
Although file formats can be proprietary, .docx is an open format standardized by Microsoft. We could create a word document reader but it will be out of the scope of this article. So we will settle for a simpler format to help understand how files look internally.
Bitmap
Understanding how a bitmap works is a good basis for understanding how any file works.
Back in the 90s, the use of bitmap was more common. When you installed an application, you were more likely to see image assets as .bmp files. The biggest inconvenient was that the file size is large. Imagine being on dial-up trying to download a photo your friend sent you only to find out that he saved it as a .bmp and it is 3 megabytes.
Bitmap is not the most internet friendly format but is the simplest form of image format available. Simple because it doesn't usually use any compression. The image data is raw. You can read the pixels and colors without having to decode anything.
Let's explore it's structure and see how we can create a bitmap on our own.
Bitmap File Structure
If you open a bitmap file on a text editor, obviously you will see some gibberish. But if you look closely at the first 2 characters they are BM. This is the file signature. These two characters are used to identify a windows bitmap file. Graphic viewers and editors check for these two bytes to determine if your file is a valid bitmap, even if you change the extension to something else.
Quick Note:
File recovery software scan the free space on your hard drive to find deleted files. They look for file signatures like BM to understand what type of file is currently occupying the space.
These characters are 1 byte each and are represented as 0x42 0x4D in hexadecimal which is equivalent to BM in the ASCII table.
This value is part of the Bitmap file header, which is a total of 14 bytes (BM included). There are 4 more values present right after the file signature:
- File Signature 2 bytes (BM, BA, CI, ... depending of the bitmap version)
- The file size 4 bytes
- Application Reserved value 2 bytes
- Application Reserved value 2 bytes
- the starting position of the image pixel data 4 bytes
By simply reading the first 14 bytes of a bitmap, you can have all this important information about it.
The following 4 bytes mark another important part of the bitmap file: the DIB header (Device independent bitmap or bitmap information header). This section describes the image. There are many versions of this header and each adds its own features. For example, I saved a small image using GIMP on Ubuntu and the version it used was BITMAPV4HEADER. The version number is determined using the value of those 4 bytes. The value represent the size of the header.
- BITMAPINFOHEADER 40 bytes
- BITMAPV2INFOHEADER 52 bytes
- BITMAPV3INFOHEADER 56 bytes
- BITMAPV4HEADER 108 bytes
- BITMAPV5HEADER 124 bytes
The 4 bytes that state the version are inclusive. When we create a bitmap ourselves below we will use BITMAPV4HEADER in more details.
In the file header, the 5th value tells us where the image pixel data starts, and that is usually right after the end of the DIB header.
The rest of the data continues until the end of the file. How it is structured depends on the values set inside the dib header. For example, we can set it to be a 1, 4, 8, 16, 24 or 32. Commonly it is set to 24bits to support RGB true colors. In that case, we have sets of 3 bytes representing R G B as 8 bit values each ranging from 0 to 255.
That's it! That's how a bitmap file looks like. Next time you see a bitmap opened as a text file, you could easily decipher the girl in red.

This is a text file, you just happen to be enlightened.
Ok now that you have an idea what the bytes mean inside the file, lets see how we can create it using a programming language. We will use PHP.
Creating a Bitmap using PHP.
Let's create a small 16x16 white to black gradient, similar to the one I created in GIMP.
$handle = fopen("gradient.bmp", "w+");

// File signature "BM" in hex 2 bytes
fwrite($handle, pack("C2",0x42,0x4D));

// File size, 2 reserved values "0",
// and position the image begins (14+108 = 122 = 0x7A)
// 12 bytes
// Lfilesize/S2resvalue/LimageDataOffset
fwrite($handle, pack("LSSL", 890,0x00,0x00,0x7A));

// Bitmapheader version, going for V4 = 108
// 4 bytes
fwrite($handle, pack("L", 0x6C));

$bitmapv4header = array(
        "Width 16"          => 'l', // Long 4bytes
        "Height 16"         => 'l', // Long 4bytes
        "Planes 1"          => 'S', // Word 2bytes
        "Bitcount 24"       => 'S', // Word 2bytes
        "Compression 0"     => 'L', // DWORD 4bytes
        "Sizeimage 768"     => 'L', // DWORD 4bytes
        "XPelsPerMeter 2835" => 'l', // Long 4bytes
        "YPelsPerMeter 2835" => 'l', // Long 4bytes
        "ClrUsed 0"         => 'L', // DWORD 4bytes
        "ClrImportant 0"    => 'L', // DWORD 4bytes
        "RedMask 16711680"  => 'L', // DWORD 4bytes
        "GreenMask 65280"   => 'L', // DWORD 4bytes
        "BlueMask 255"      => 'L', // DWORD 4bytes
        "AlphaMask 0"       => 'L', // DWORD 4bytes
        "CSType 0"          => 'L', // DWORD 4bytes
        "Endpoints 0"       => 'L9', // CIEXYZTRIPLE ??? 36 bytes
        "GammaRed 0"        => 'L', // DWORD 4bytes
        "GammaGreen 0"      => 'L', // DWORD 4bytes
        "GammaBlue 0"       => 'L', // DWORD 4bytes
);

// Create bitmapheader values
$format = "";
$values = [];
foreach ($bitmapv4header as $key => $f){
    $format .= "$f";
    $bits = explode(" ", $key);
    if ($bits[0] === "Endpoints"){
        for($i=0;$i<9;$i++){
            $values[] = 0;
        }
    }else {
        $values[] = (int)$bits[1];
    }

}
$arr = array_merge(array($format),$values);
fwrite($handle, call_user_func_array("pack", $arr));


// Draw gradient
$imgData = "";
for($i = 0;$i< 16;$i++){
    for($j = 0;$j< 16;$j++){
        $imgData .= pack("CCC",$i*15,$i*15,$i*15);
    }
}
fwrite($handle, $imgData);
fclose($handle);
Let's go through this code. I created a new writable file using fopen and the first thing added is the signature "BM". It can be added as a string but just for consistency, I used the PHP function pack(). This function packs its arguments into a binary string. I used the same function throughout the code.
fwrite($handle, pack("C2",0x42,0x4D)); // BMWe already know that width and height of the file so we can calculate it's final size ahead of time:
( (width x height) x (24 bits in bytes) ) + header + dib
( ( 16   * 16    ) * ( 3 )              ) + 14     + 108
= 890 bytes
The reserved keywords stay at 0 and we can determine where the image pixel data will be located. 14 + 108 = 122
fwrite($handle, pack("LSSL", 890,0x00,0x00,0x7A));We then set the version of our bitmap header to BITMAPV4HEADER using the value 108, 0x6C in hex.
fwrite($handle, pack("L", 0x6C));I listed each of the values of the header in an array where I can dynamically generate a string from. As long as the final is 104 bytes (header version excluded):
// generated function
fwrite($handle, pack("LLSS...",0x10,0x10,0x01,0x18,...));
The final thing is to create the gradient, all I did is to create nested loops to create one shade of black to white at a time. The values are RGB, 8bit each. Remember that each value is in the range of [0 - 255]. Note that the image is going to be read from bottom left to right (upside down).
To test the file, you can open it in your favorite text editor and read the gibberish. Note the BM in the beginning of the file. If that's not enough you can open the image on your favorite image viewer, like mspaint, photoshop, or the web browser.
Now you know how to generate a bitmap.
Why learn the structure of a bitmap?
I should have placed this section above but here we are. Bitmap is one of the simplest binary formats. It doesn't require any compression so you don't have to get any 3rd party library to create it. It is also a good introduction to other formats like PNGs, or JPEGs. A PNG for example, uses a different file structure, things are not as linear. What they all have in common is a signature. You can determine the type of files they are without even reading their extension, and as stated earlier, it could help you recover deleted files.
Now if you where to read the specs of a format like a PNG, you will understand the way data is packed inside what first looked like gibberish in a text editor.
This is only the first step in working with files. Maybe one day you will encounter an obscure file type no longer supported by any application but you will still be able to retrieve the data from it.
Thank you for reading, I hope you find a good use of your new powers.
Resources.
- Bitmap File Format
- BITMAPV4HEADER structure
- PHP pack function
- BITMAP Graph
- Interesting Stackoverflow question


Join the Conversation